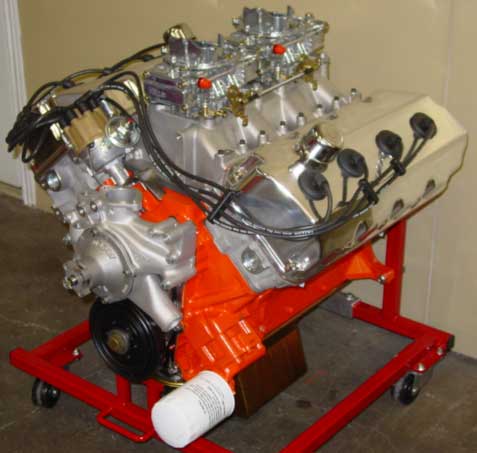
The Engine
[The Engine] [Cylinder Heads] [Engine Blocks] [Fuel System] [Ignition System] [Cooling System]
Click to Print – QUESTION SHEET |
|||||
HISTORY |
|||||
| Almost every vehicle you have ever been in has been powered by an Internal Combustion Engine.
This invention is one of the greatest advancements of the industrial world since, like, pants. Back when the Dead Sea was still sick, all our work was either done by our own hands or with the help of animals such as horses and oxen. By the early 1700’s we were able to effectively harness the steam from boiling water to do work for us – this was an External Combustion Engine, where the burning of the fuel was done outside the engine itself (we actually used the steam). The engine as we know it was patented in 1876 by Nikolaus Otto with a 4-stroke design, and in 1879 by Karl Benz with a 2-stroke design (Karl had a daughter named Mercedes….). By 1885 we were already trying to supercharge it for more power, thanks to a design by Gottlieb Daimler. Oh, hey: “Engine” (from Latin ingenium, meaning “ability”) means any piece of machinery. “Motor” (Latin motor meaning “mover”) is any machine that produces mechanical power. An “Electric Motor” is a correct term, while a “Combustion Engine” is not a correct term. It should really be called a “Combustion Motor.” I will be using the terms Motor and Engine interchangeably.
|
|||||
TERMINOLOGY |
|||||
| I am going to use a variety of terms, and refer to engines in a number of different ways. You’ll need to know some terms to not get lost. Yeah – you’re kinda learning a whole new language here. Here’s some:
ARRANGEMENT: How multiple cylinders are arranged. They are commonly inline with each other (ie: “Straight 6”, split into a “V” (ie: “V8”), or Horizontally Opposed (ie: “boxer” or “pancake”) DIPLACEMENT: How large an engine is. Usually measured in Liters (L), or Cubic Centimeters (cc), or Cubic Inches (“ci” or “cid”). Traditionally, engines were referred to by their displacement in Inches, whereas today, most engines are measured in Liters. I usually refer to engines by how they were originally designated by the manufacturer – the engine in a ’70 Mustang will be a 302ci, while the engine in a ’90 Mustang will be a 5.0L – even though they are the EXACT SAME engine. BORE: The diameter of the cylinder. An engine that has been “bored out” has had the cylinder bore (diameter) machined larger and oversize pistons installed. This increases the displacement, and makes more power. STROKE: Distance the piston travels on a stroke, or the distance from TDC to BDC. The stroke is twice the distance of the throw. An engine that has been “stroked” has had the crankshaft custom machined to move the piston a greater distance. This increases the displacement as well as the compression ratio which produces more power. TOP DEAD CENTER (TDC): Point of uppermost travel of the piston down the cylinder bore, “Dead Center” of its rotation BOTTOM DEAD CENTER (BDC): Point of lowermost travel of the piston and crankshaft down the cylinder bore, “Dead Center” of its rotation |
|||||
The FOUR STROKE CYCLE |
|||||
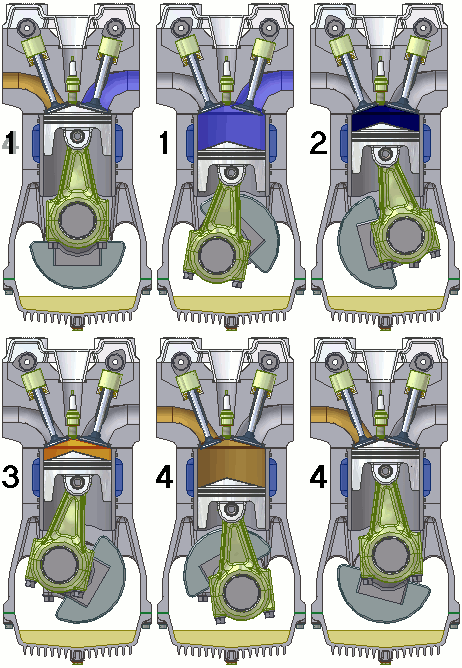
While all Automobiles and Motorbikes complete the cycle of combustion, they will do it in one of two ways:
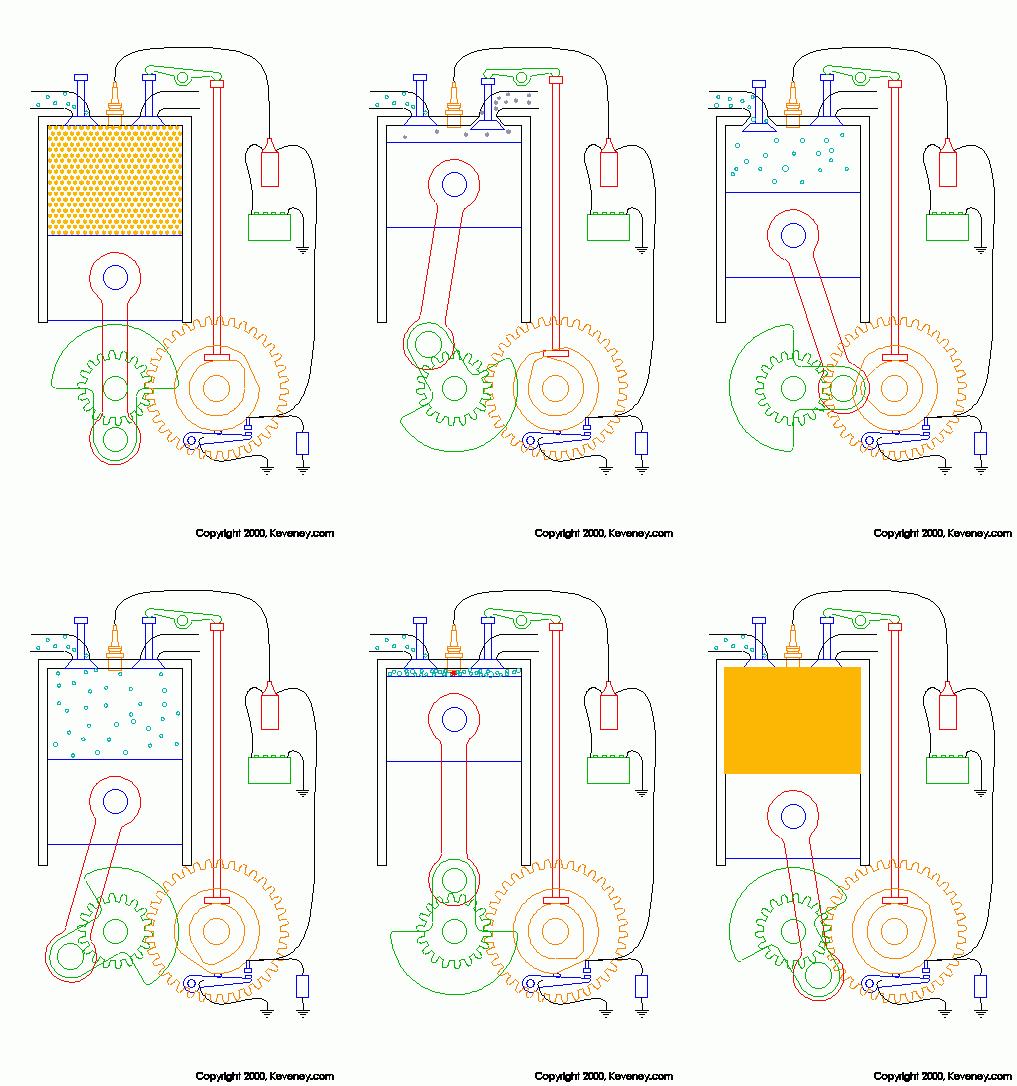
4 Stroke
|
|||||
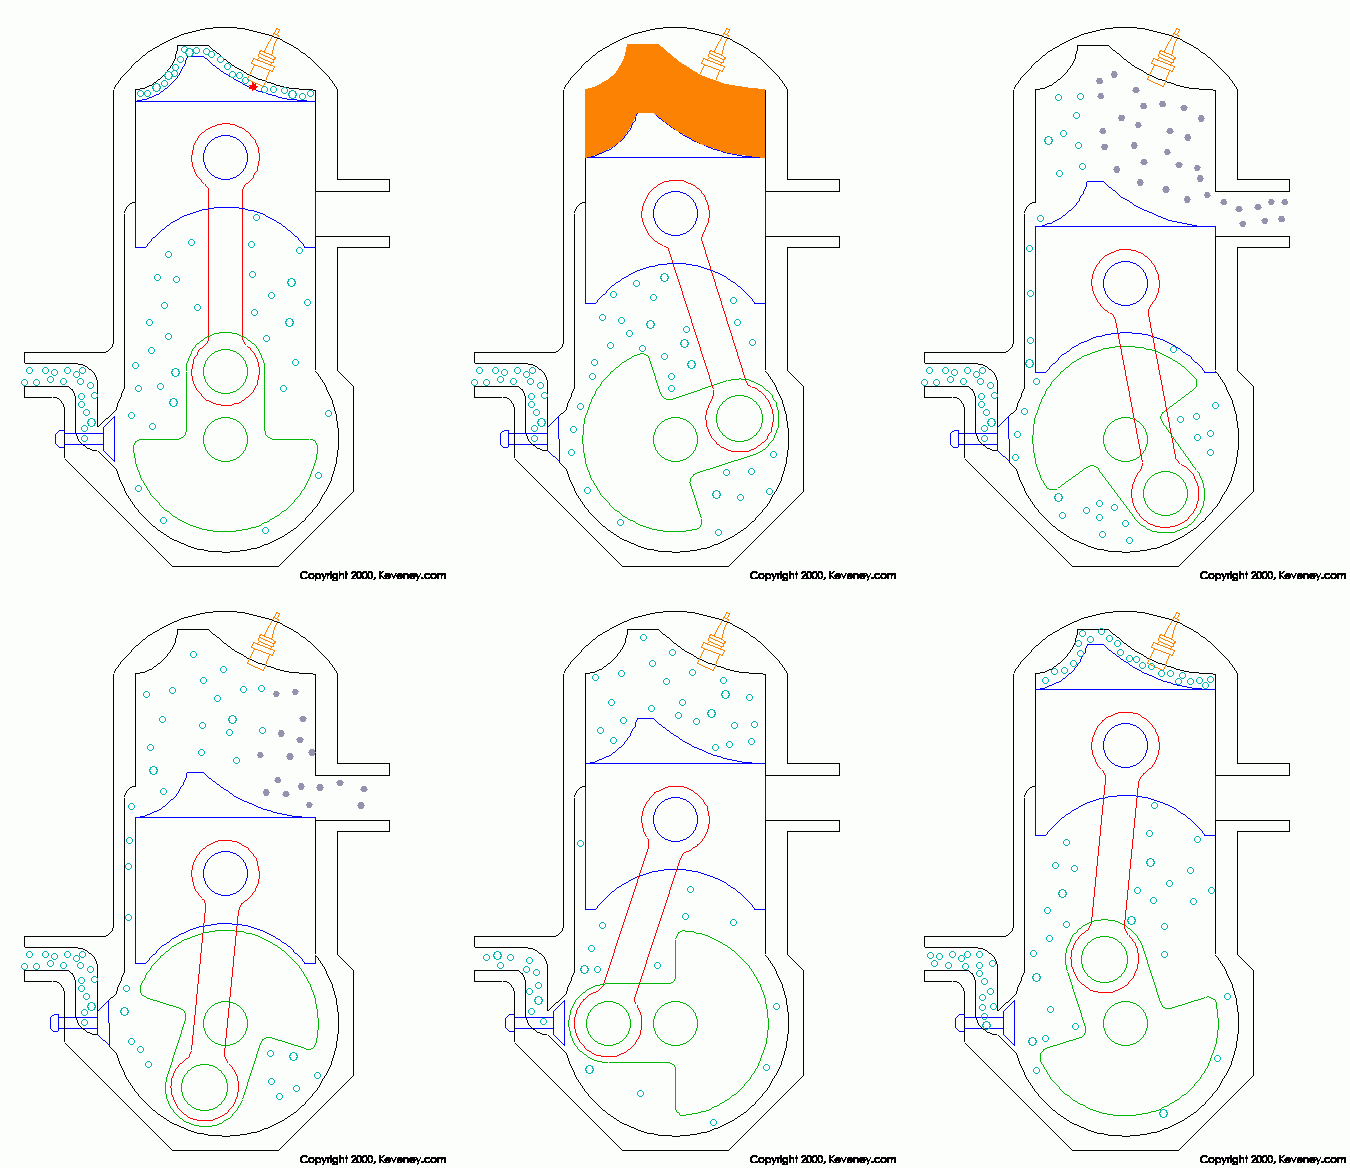
2 Stroke
Notice that the air and fuel and oil is drawn into the crankcase of the two stroke engine. The oil is there to lubricate everything. Some of the oil gets drawn into the cylinder and burned (making the exhaust blue). Notice the back wave from the exhaust going back to push the escaping air and fuel back into the cylinder. Without a proper exhaust system, a two stroke will not make any power at all, ever, since all the air and fuel will just float right on out the exhaust. |
|||||
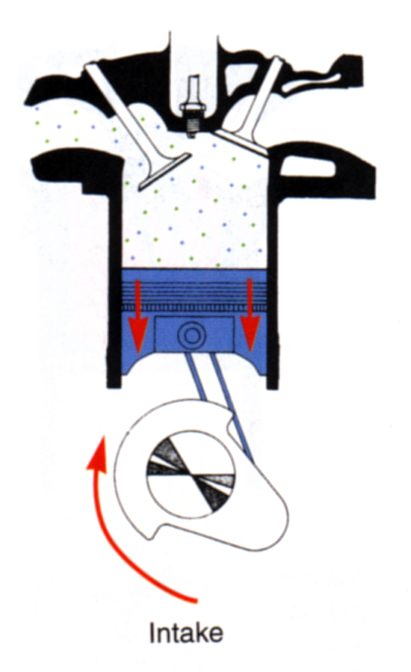
INTAKE STROKE |
|||||
|
|||||
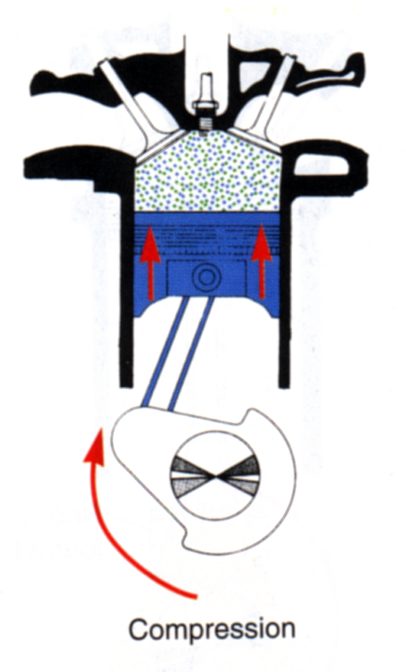
COMPRESSION STROKE |
|||||
|
|||||
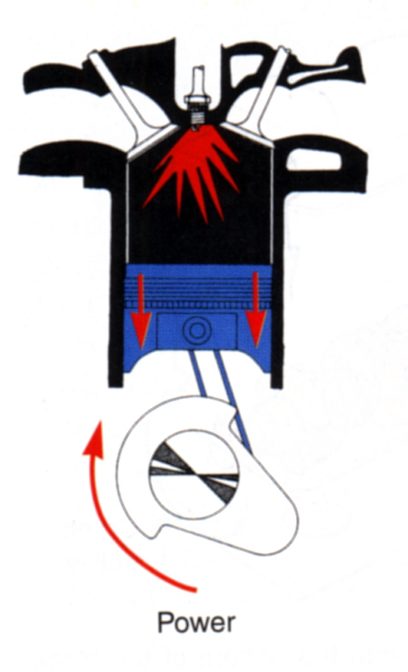
POWER STROKE |
|||||
|
|||||
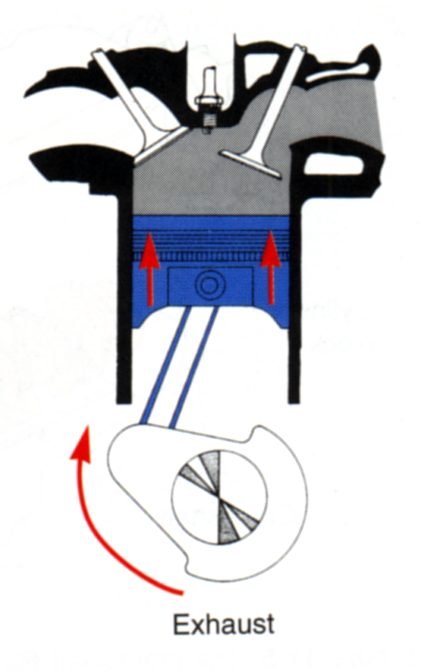
EXHAUST STROKE |
|||||
|
|||||
COMPRESSION RATIO |
|||||
| You may hear people bragging about having a “high compression engine.” This is, indeed, something to brag about!
All things being equal, the more you compress the air and fuel, the more heat you put into the air and fuel, the bigger the combustion power will be. This is a very good thing for power AND fuel economy. There are practical limits – once the fuel starts detonating, or exploding by itself (instead of burning in a controlled manner), DAMAGE occurs (this “detonation” sounds like a diesel). |
|||||
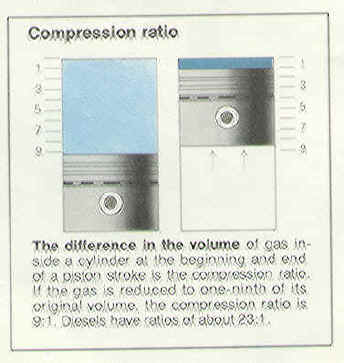
| The “Compression Ratio” is the amount the mixture is squeezed on the compression stroke
All other things being equal, the more the fuel/air mixture is compressed, the more power AND the more fuel economy the engine produces As the mixture is compressed, it becomes hotter. If it becomes hotter than the flash point of the fuel, the fuel explodes prematurely (instead of controlled burning), and engine damage results. This is called pre-ignition, or detonation; or more commonly, knock, or ping. Detonation will blow holes through pistons – you will see melted aluminum in your spark plugs. This is the limiting factor to how far you can go with increasing compression ratios.
A typical compression ratio might be 10:1 10 units of air/fuel squeezed into 1 unit of air/fuel
|
|||||
| Compression Ratios of Different Engines:
4:1 Vintage cars – because of poor quality of fuel, and hand crank starting system 8:1 – 10:1 Modern Production Cars – higher compression ratios with computerized engine management to prevent knock and ping. 10:1 is about the limit on regular pump gas. Up to 12.5:1 Muscle Cars from the late 1960’s – until low emissions became more important, compression ratios were reduced, to reduce NOx (Learn about Emission Controls). Some computer controlled engines are better at living at this high a compression ratio Up to 17:1 Race Cars – because they use better quality high octane gasoline or alcohol Up to 25:1 Diesel Engines – diesels take only air in on the intake stroke, and use the high temperature of the highly compressed air during compression stroke to ignite fuel which is injected directly into the combustion chamber at exactly the right time. |
|||||
Video: Compression Ratio3 |
|||||
ENGINE SIZE (Cubic Displacement) |
|||||
| There is no replacement for displacement. Bigger is always better. Too much might be just about right.
An over-worked small engine may get poor fuel economy, and have no power to show for it. A loafing big motor will may good fuel economy, but have lots of power in reserve when you need it.
What is engine displacement? “The total amount of air/fuel mixture the engine is theoretically capable of taking in during one cycle” “The volume of all the cylinders, but not the combustion chambers, put together”
Measured in Cubic Inches (cu. in.) in imperial measurement, or in Cubic Centimeters (c.c.’s) or Liters (l) in metric measurement The amount of power an engine produces, is a direct function of how much air the engine moves, and the larger the cylinders are, the more air and fuel they can take in. One engine that is twice as big as another, does not necessarily have twice as much power though, because it also has much more internal friction, or drag. It does, however consume twice as much fuel.
|
|||||
| Displacement Formula
(Volume of a cylinder, you did this in Math 9):
V = (Volume of a cylinder) x (number of cylinders)
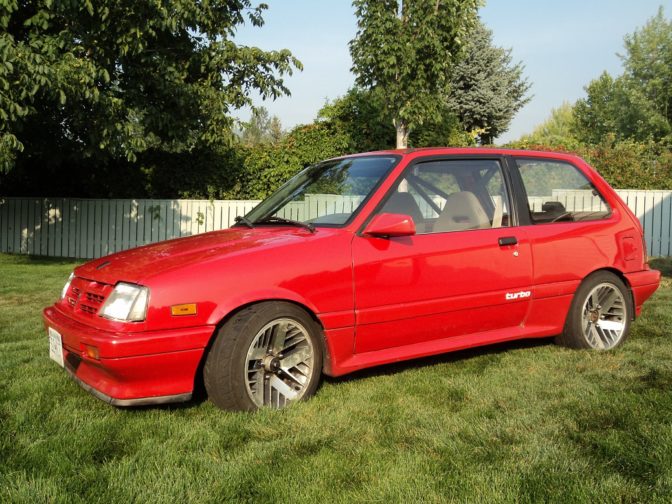
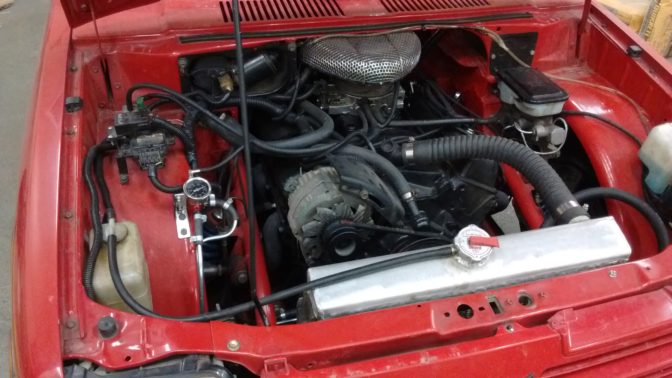
I like bigger engines so much, I tend to do “Engine Swaps.” I’ve done some where I doubled the engine size in a vehicle. The most EPIC engine swap I ever did was in this Pontiac Firefly: I removed the 1.0L inline-3, and installed a 5.7L V8 (and converted to rear-wheel-drive). Yes, that is almost SIX TIMES BIGGER engine. It had some scoot after that. I called it the Fiendish Firefly.
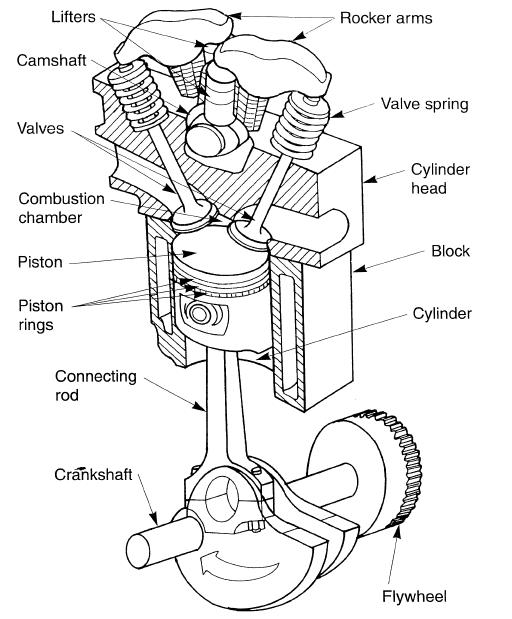
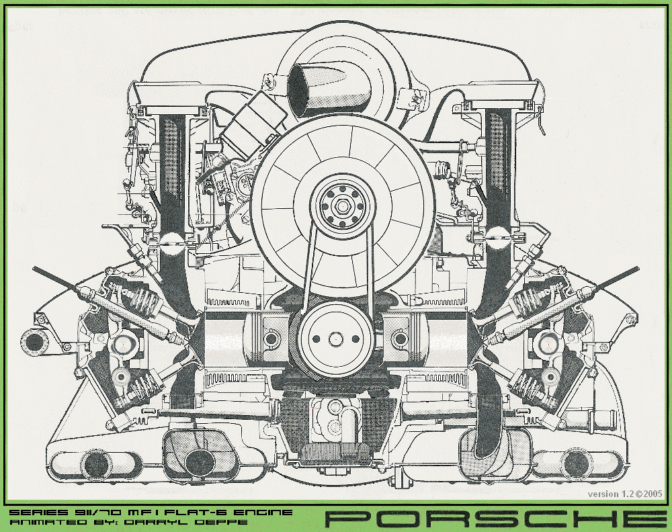
ENGINE PARTSThe basic engine has been pretty much standardized since the 1800’s. There are some differences between manufacturers, but once you understand one automotive engine, you can understand all automotive engines – the basic parts and principles are the same. This picture shows the basic parts common to most engines today. CYLINDER BLOCK: Strong and rigid, houses the crankshaft, connecting rods, pistons and cylinders. Usually made of Cast Iron or Aluminum. This bolts into the vehicle, and the transmission bolts to this. CYLINDER HEAD: Houses the intake and exhaust valves and ports. CRANKSHAFT: Receives the force from the piston and connecting rod and rotates. Additional weight is opposite the Throw (the piston end), to counter the weight of the piston and connecting rod, called “counterweight.” FLYWHEEL: A heavy mass that provides enough momentum to keep the crankshaft turning during the non-power strokes. The clutch is bolted to this to drive the transmission. The starter also engages teeth on the flywheel to start the engine. A heavy flywheel makes an engine smooth and steady, a light flywheel makes it rev quicker, or accelerate faster. CONNECTING ROD: Changes the reciprocating motion of the piston to the rotating motion of the crankshaft. PISTON: Draws air and fuel in, compresses it, receives the force of combustion, and pushes the exhaust out. PISTON RINGS: Seals the cylinder so nothing from the cylinder gets into the crankcase, and nothing from the crankcase gets into the cylinder. INTAKE & EXHAUST VALVES: Allow the air and fuel into and out of the cylinder. At least one of each valve, however, the more valves you can fit the more power you can make and the higher you can rev. Maserati experimented with 6-valve engines. CAMSHAFT: Open the valves at the correct time. It might be located in the Cylinder Block, or the Cylinder Head depending on the engine. LIFTERS: Are acted upon by the camshaft, and push on the valves. Sometimes they are adjustable to have clearance between the valve and the rocker arms, sometimes they are “self-adjusting.” ROCKER ARMS: Used when the valve is not directly in line with the camshaft – it acts like a lever to get the camshaft motion to where the valve is. Sometimes they are adjustable to have clearance between the valve and the rocker arms. VALVE SPRINGS: These actually close the valves
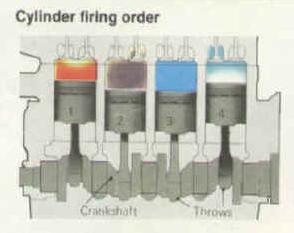
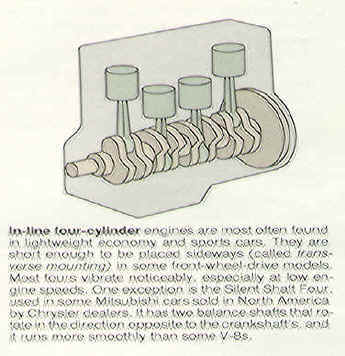
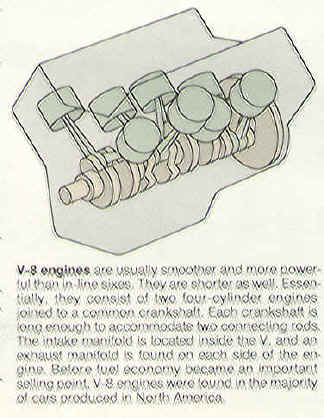
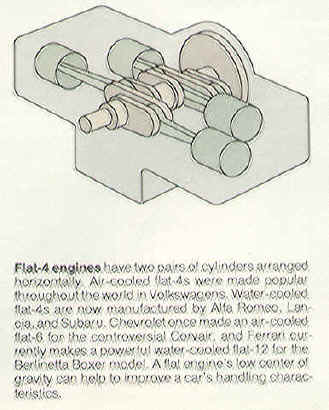
CYLINDER ARRANGEMENTThe first engine was probably a single cylinder. And I imagine it wasn’t too long before someone decided to add another cylinder and make it a 2-cylinder engine. And then a 4-cylinder engine. And then a 6-cylinder engine. And so on. These added cylinders could just all be added in a straight line (a Straight-8 is the largest I’ve seen), or maybe opposite each other (“horizontally opposed,” like a Subaru or Porsche), or in a V-arrangement to better package the engine in a car (ah, the V8 – the engine of my people). The throws on the crankshaft (like the “pedal arm” on a bicycle) are arranged so that the pistons do not all move up and down at the same time (this would make the engine horribly unbalanced, and shake itself to bits). Arranging the throws allows the proper strokes of each piston to occur at even intervals in most engines, which tends to minimize vibration. In engines, the cylinders are numbered from front (pulley end) to back (flywheel end). If, in a 4-cylinder engine, the spark plugs fired in numerical order (1, 2, 3, 4), the engine would be out of balance and vibrate excessively. Vibration is reduced by firing the spark plugs in an order of 1, 3, 4, 2 (shown in the illustration).
Almost all inline 6-cylinder engines have a firing order of 1, 5, 3, 6, 2, 4 – balancing outer cylinders and inner cylinders, on opposite ends of the engine.
Of all the different cylinder arrangements, the least efficient has to be the inline arrangement. They are relatively long and large. Heavy counterweights must be used on the crankshaft to “ballance” the weight of the pistons to keep the engine from vibrating. Many of the larger cars from the 50’s and earlier had Straight-8 engines – an inline 8 cylinder! That is why the cars of the day had a long, high engine hood – to clear that monster of an engine. V type cylinder arrangements make for a much shorter engine and therefore, a shorter, stiffer crankshaft. They don’t need as heavy a counterweights on the crankshaft because the weight of one bank of pistons partially offsets the weight of the other bank. The “Horizontally Opposed,” “Flat,” “Boxer” or “Pancake” arrangement is the most efficient of all. It has a short stiff crankshaft, and the weight of one bank of pistons totally offsets the weight of the other bank. This engine is said to be inherently well balanced.
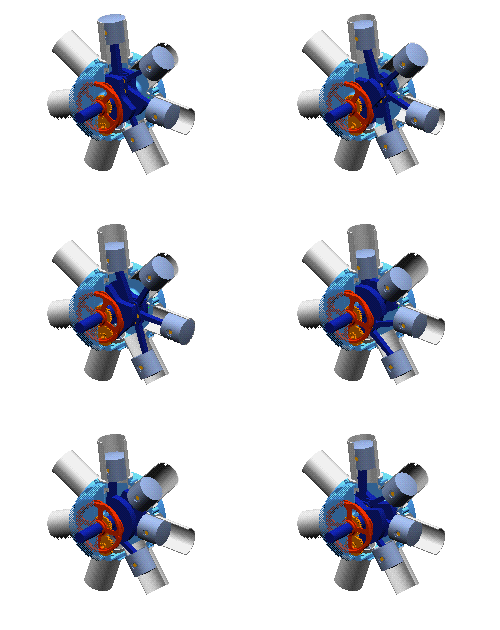
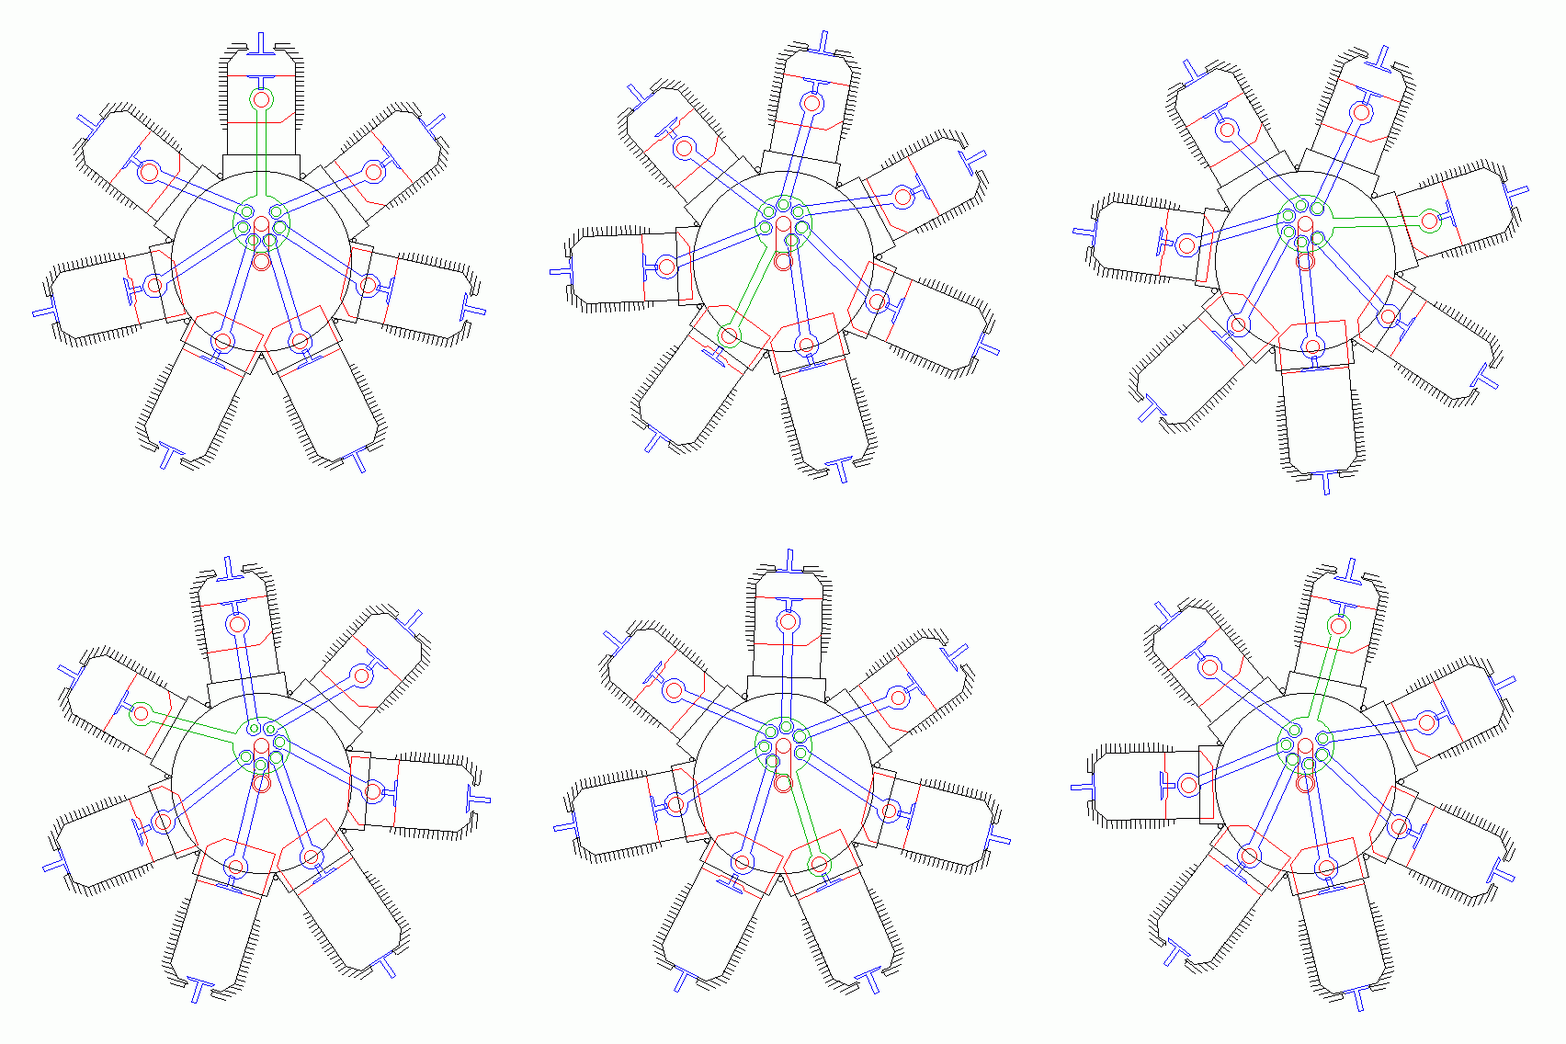
Because of its efficiency and light weight, the horizontally opposed engine is used almost exclusively in light aircraft. While light weight is important in cars, it is even more important in aircraft. Lighter weight means more payload, longer range, and more performance. Larger aircraft in the bad old days used radial engines with up to three banks of nine cylinders (twenty seven cylinders), with up to 3500 cu.in. and 3000 horsepower.
OTHER ENGINE DESIGNSFour Stroke Engine:
Two Stroke Engine:
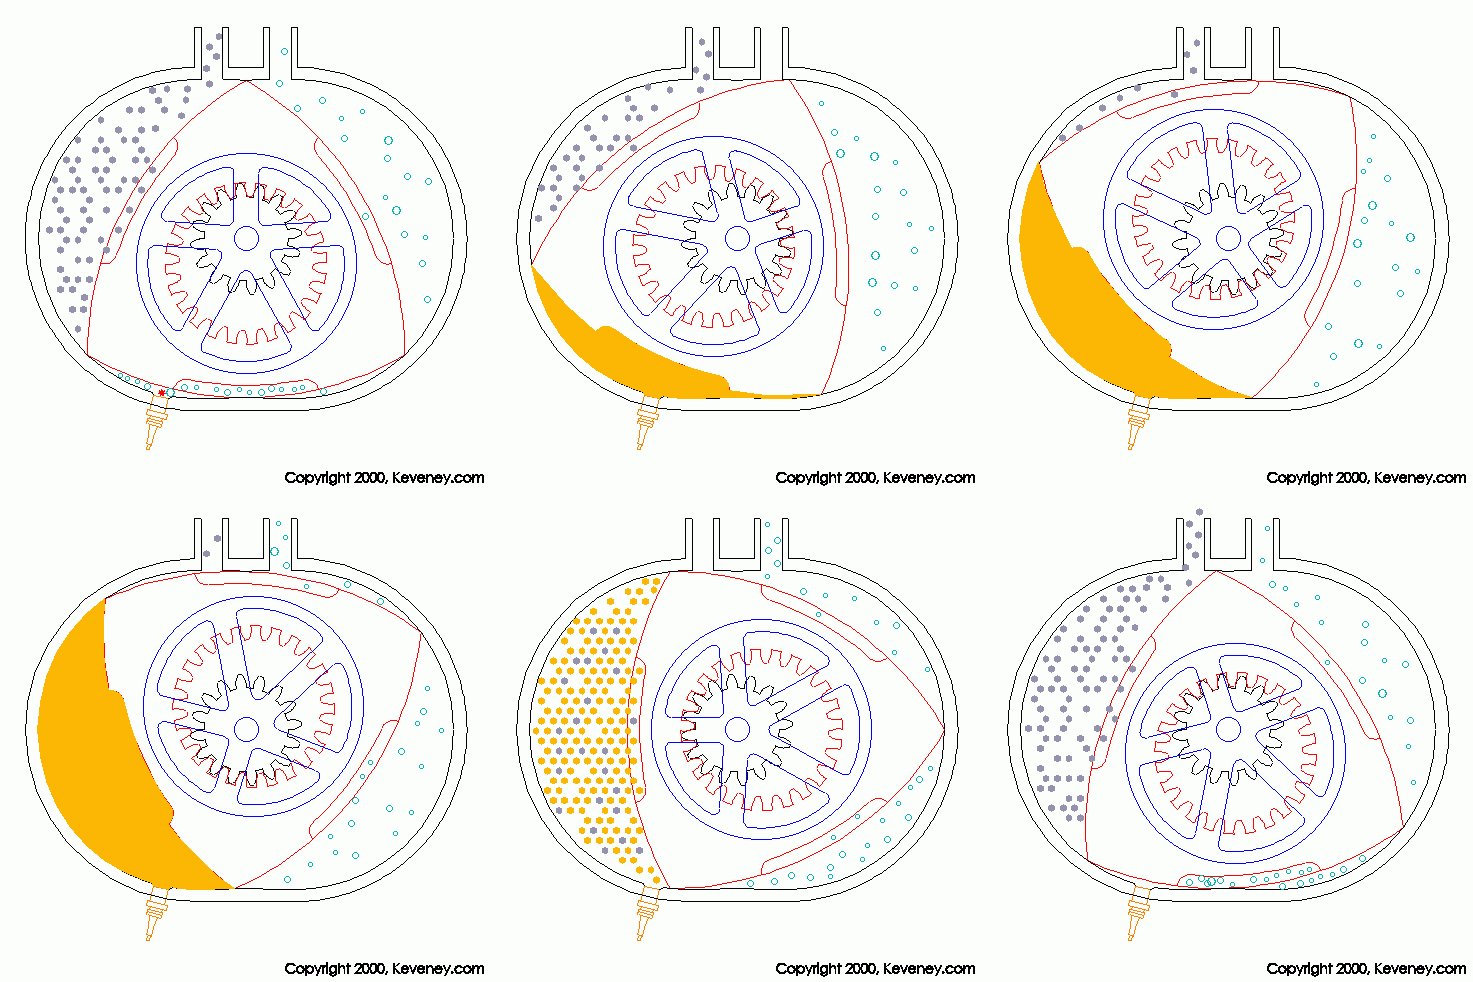
Wankel Rotary Engine:
Gnome Radial Engine:
“Liquid Piston” Engine:
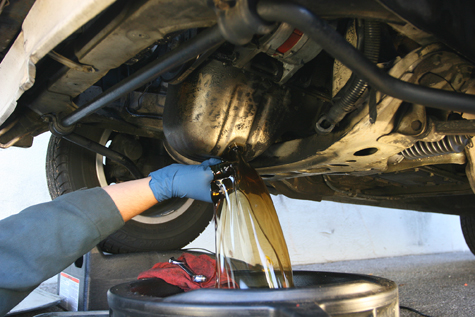
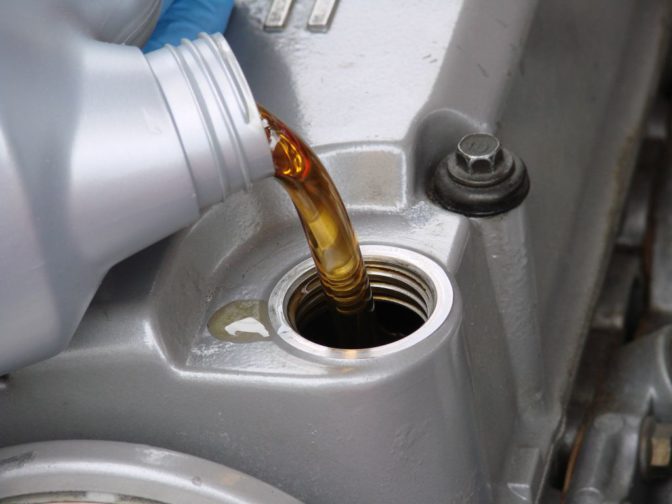
ENGINE TESTINGWhen an engine is brand new, all the parts have been machined to the exact size they need to be, with the exact clearances they need between each other. As an engine is used, these parts will start to wear. WANT YOUR ENGINE TO LAST?We can make the engine last longer by: Using high quality engine oil to lubricate the engine well Changing the oil frequently so that the oil and oil additives are fresh Treating the engine nice by letting it warm up fully before we abuse it Getting the engine to heat up quickly (the MOST wear occurs when the engine is cold).
Eventually, the wear in the engine will become so great that performance and economy will begin to suffer. Lucky for us, it is really easy to test an engine and see what kind of shape it is in before we even get dirty trying to fix it.
Fascinating video on Motor Oil quality and testing (neat to know, not need to know):
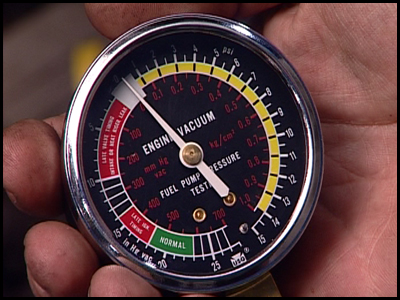
There are three tests we commonly do: VACUUM TESTA Vacuum Test tells how badly an engine sucks. Hahahahahaha. No, seriously. We use a simple vacuum gauge, connect it to the intake manifold and measure how much, and how consistently the engine draws vacuum. Observe the results: ENGINE CRANKING (but not running) If the cranking speed is normal, the engine vacuum should be about 5in-Hg (inches of Mercury) and even. Uneven = a problem in one cylinder, low = mechanical problems. ENGINE IDLING Normal: steady 16 to 22 in.-Hg (inches of Mercury – the unit of measurement for vacuum). Low but steady: the spark plugs are firing too late, or the valves are opening too late, or vacuum leaks Normal but Fluctuating: A problem in one or two cylinders. Broken ring, leaking valve or faulty fuel injector ENGINE CRUISE Rev to 2500rpm for 15 seconds Vacuum Steady: This is good Vacuum Drops: Plugged exhaust Now release the throttle and let the engine fall back to idle Vacuum Jumps, Then Normal: this is good Vacuum Does Not Jump: Worn rings, cylinders or valves
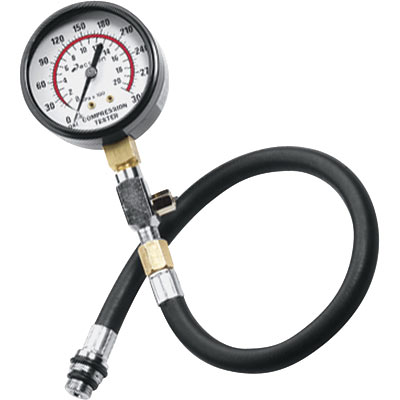
COMPRESSION TESTINGCompression tests show how much your engine sucks. Hahahahahahahaha. No, seriously. While a Vacuum Test can give you a pretty good idea about the condition of the engine, a Compression Test can give you a very good idea about the condition of a cylinder. A Compression Test involves measuring how much the cylinder actually compresses the air inside the cylinder. This pressure is measured in Pounds per Square inch (PSI). Most engines are around 150psi, but engine specifications (specs) can range between 100psi and 220psi depending on the engine. When I buy used cars, I bring along a Compression Tester and tools so I can test the engine right there. Finding problems can help work the seller down in price. On my own engines I do a compression test every year just to keep tabs on the condition of the engine – I write the results on the underside of the hood as a reference.
WITHIN SPEC This is good
LOW READING Compression is leaking out somewhere (either rings or valves). This is costing you power. Squirt about a tablespoon of oil into the cylinder and re-test. If the new reading goes up significantly, this means the piston rings are leaking (the oil sealed them). If the reading does not go up significantly, the valves are leaking (the oil cannot seal the valves). Try adjusting the valve clearance (also called lash) – perhaps the cam is not allowing the valves to close all the way. If this does not fix it, the valve is probably screwed and needs to be fixed. Ford says “as long as they are within 80% of each other, we’re good.” Apparently completely worn out is still ok.
HIGH READING This is not common. If the engine is an oil-burner, it could be that there is carbon built up inside the combustion chamber and making the air and fuel compress into a smaller space.
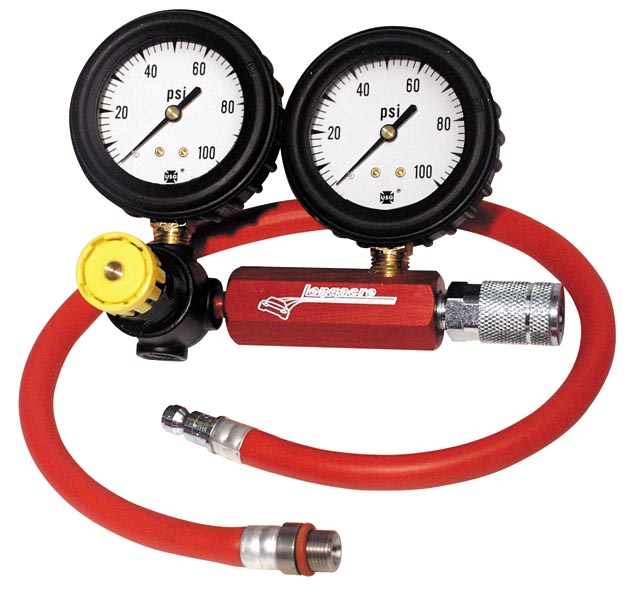
LEAK-DOWN TESTINGThis is the ultimate test. This tells you where everything is going, and can help PIN-POINT problems. A Leak-Down Test pumps compressed air into the cylinder of a non-running engine, and measures how much of that air is leaking out. It can tell you a LOT about an engine, including specifically WHERE the air is leaking.
5-20% This is good. Anything below 10% is quite good. I’ve NEVER seen 0%.
20% LEAKAGE Look and Listen to see where the air is going Crankcase Air: leakage past the rings – listen at the oil cap Radiator Bubbles: leakage past the headgasket or through cracks into the cooling system – watch at radiator cap Intake Air: leakage past the intake valve – listen at throttle plate Exhaust Air: leakage past exhaust valve – listen at tailpipe Try testing a cylinder with the piston at the top of the cylinder, and again with the piston at the bottom of the cylinder. If there is more leakage at the top, the cylinders are worn tapered! (not perfectly cylindrical any more)
NOISESAdapted from aa1car.com Diagnosing engine noises can be a bit of an art. With experience, and by listening closely to different parts of the engine, you can start to pinpoint where the problems are. A stethoscope can be very handy to have, though I just use a screwdriver – touch the blade end to what you want to listen to, then touch the handle end against your ear. It’s amazing what you can hear in an engine when you listen at specific places. ENGINE CLICKING NOISES A clicking or tapping noise that gets louder when you rev the engine is probably upper valvetrain noise caused by one of three things: low oil pressure, excessive valve lash, or worn or damaged parts. LOW OIL PRESSURE Check the oil level. If it is low, add oil to bring it back up to the full mark. Is the engine still noisy? Check your oil pressure. A low gauge reading (or oil warning light) would indicate a serious internal engine problem that is preventing normal oil pressure from reaching the upper valvetrain components. The cause might be a worn or damaged oil pump, a clogged oil pump pickup screen or a plugged up oil filter. Using too thick a motor oil during cold weather can also slow down the flow of oil to the upper valvetrain, causing noise and wear. VALVE LASH NOISE Too much space between the tips of the rocker arms and valve stems can make the valvetrain noisy — and possibly cause accelerated wear of both parts. COLLAPSED LIFTER NOISE Hydraulic lifters take care of valve lash for you automatically using oil pressure, unless they have “collapsed.” A collapsed lifter will allow excessive valve lash and noise. DAMAGED ENGINE PARTS NOISE Inspect the valvetrain components. Excessive wear on the ends of the rocker arms, cam followers (overhead cam engines) and/or valve stems can open up the valve lash and cause noise. So too can a bent pushrod or a broken valve RAPPING OR DEEP KNOCKING ENGINE SOUND Usually bad news. A deep rapping noise from the engine is usually “rod knock,” a condition brought on by extreme bearing wear or damage. If the rod bearings are worn or loose enough to make a dull, hammering noise, you’re driving on borrowed time. Sooner or later one of the bearings will fail, and when it does one of two things will happen: the bearing will seize and lock up the engine, or it will attempt to seize and break a rod. Either way your engine will suffer major damage and have to be rebuilt or replaced. Bearing noise is not unusual in high mileage engines as well as those that have been neglected and have not had the oil and filter changed regularly. It can also be caused by low oil pressure, using too light a viscosity oil, oil breakdown, dirty oil or dirt in the crankcase, excessive blowby from worn rings and/or cylinders (gasoline dilutes and thins the oil), incorrect engine assembly (bearings too loose), loose or broken connecting rod bolts, or abusive driving. Bearing wear can be checked by dropping the oil pan and inspecting the rod and main bearings. If the bearings are badly worn, damaged or loose, replacing the bearings may buy you some time. But if the bearings are badly worn or damaged, the crankshaft will probably have to be resurfaced — which means a complete engine overhaul or replacing the engine is the vehicle is worth the expense. ENGINE PINGS OR KNOCKS WHEN ACCELERATING The cause here may be Spark Knock (Detonation) caused by an inoperative EGR valve, over-advanced ignition timing, engine overheating, carbon buildup in the combustion chambers, or low octane fuel.
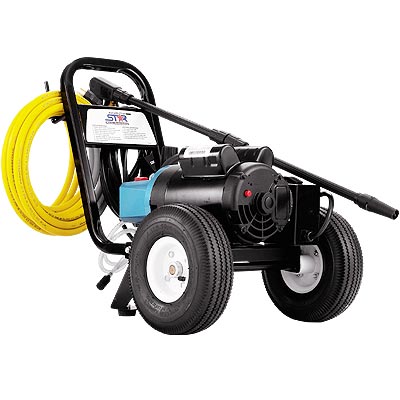
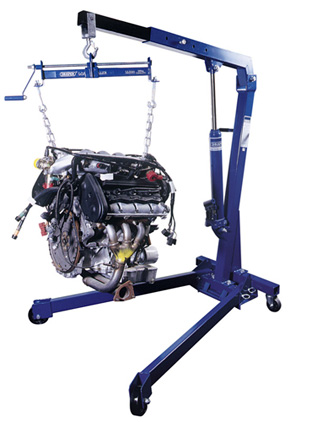
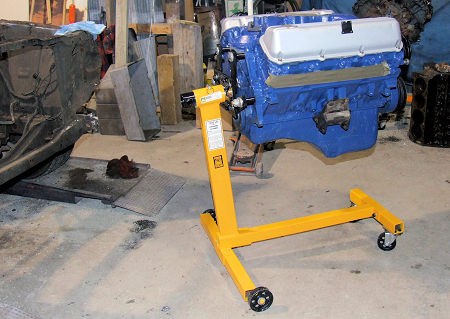
ENGINE REMOVALOnce an engine has been tested and condemned, it needs to be removed and readied for rebuilding. It’s never fun to work on a greasy grimy engine, so we need to clean all the crud off so we don’t have to get filthy working on it. Pressure Washing
Engine RemovalIn removing the engine, it is very important that you can follow these tips to help ensure success:
I cannot stress enough, the importance of organization!!! I cannot stress enough, the importance of organization!!! This list is pretty general, and is there really to open your eyes to what is involved. Every vehicle will have a slightly different list, but for the most part this works:
|


