Body Chassis Drivetrain |
Electrical Interior MegaSquirt |
First Drive Racing Media Daily Driving |
After two seasons with the car, I became annoyed with some of the limitations of the OEM fuel injection. It ran very rich for most of the time, and pig-rch at full throttle. The engine was fun below 4500rpm (the removed T-VIS switch point), and then something changed in the tuning and was a whole lot more fun from there to the redline.
I decided to go MegaSquirt. For a control-freak like me, having full control over everything excites me.
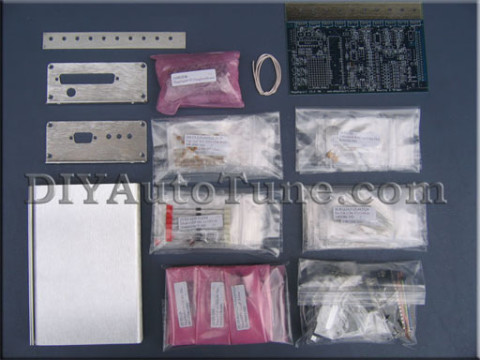
MSIIv3.0 unassembled kit (DIY AutoTune image)
I ordered MegaSquirt II, V3.0 from DIY Auto Tune and was very happy with their service as well as the product. Since I was going MegaSquirt, I might as well go to town, and I bought a set of GSX-R/600 Independant Throttle Bodies (ITB’s) off eBay for about $60, and bought all the Ford EDIS stuff from Pick-and-Pull for about $30 more.
The MegaSquirt took about 10 hours to assemble, taking my time and checking everything every step of the way. I wired it for Ford EDIS, a GM stepper IAC (not installed) and flyback circuitry for low-impedence injectors (though I am using a resistor block with low-impedence injectors).
36-1 Trigger Wheel
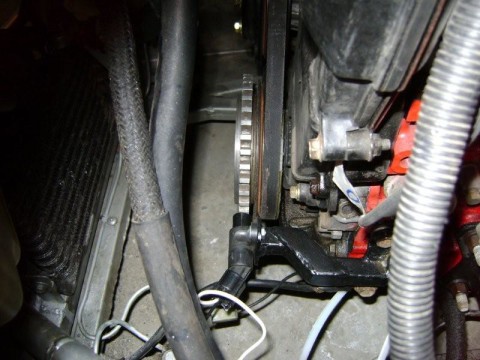
The EDIS parts were thieved from an early 90’s Ford Escort. I machined the unused power-steering pulley grooves off the crank pulley, and machined the EDIS 36-1 wheel bore to a 0.0015″ interferance fit. I put the pulley in the freezer, and boiled the wheel, and then quickly got it into place by gentle persuasion with a dead-blow hammer.
I made a sensor bracket that mounts on some unused engine block bosses, and places the sensor roughly horizontal, even with the crankshaft. The trigger wheel was placed with the missing tooth 90° ahead of the sensor.
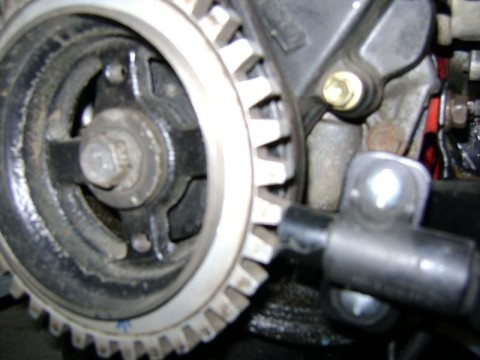
Escort EDIS wheel and sensor – not a Focus, apparently
A metric-size frost plug was also pounded into the old distributor hole in the cylinder head using Aviation Form-A-Gasket as a sealer.
Modifying and Mounting the ITB’s
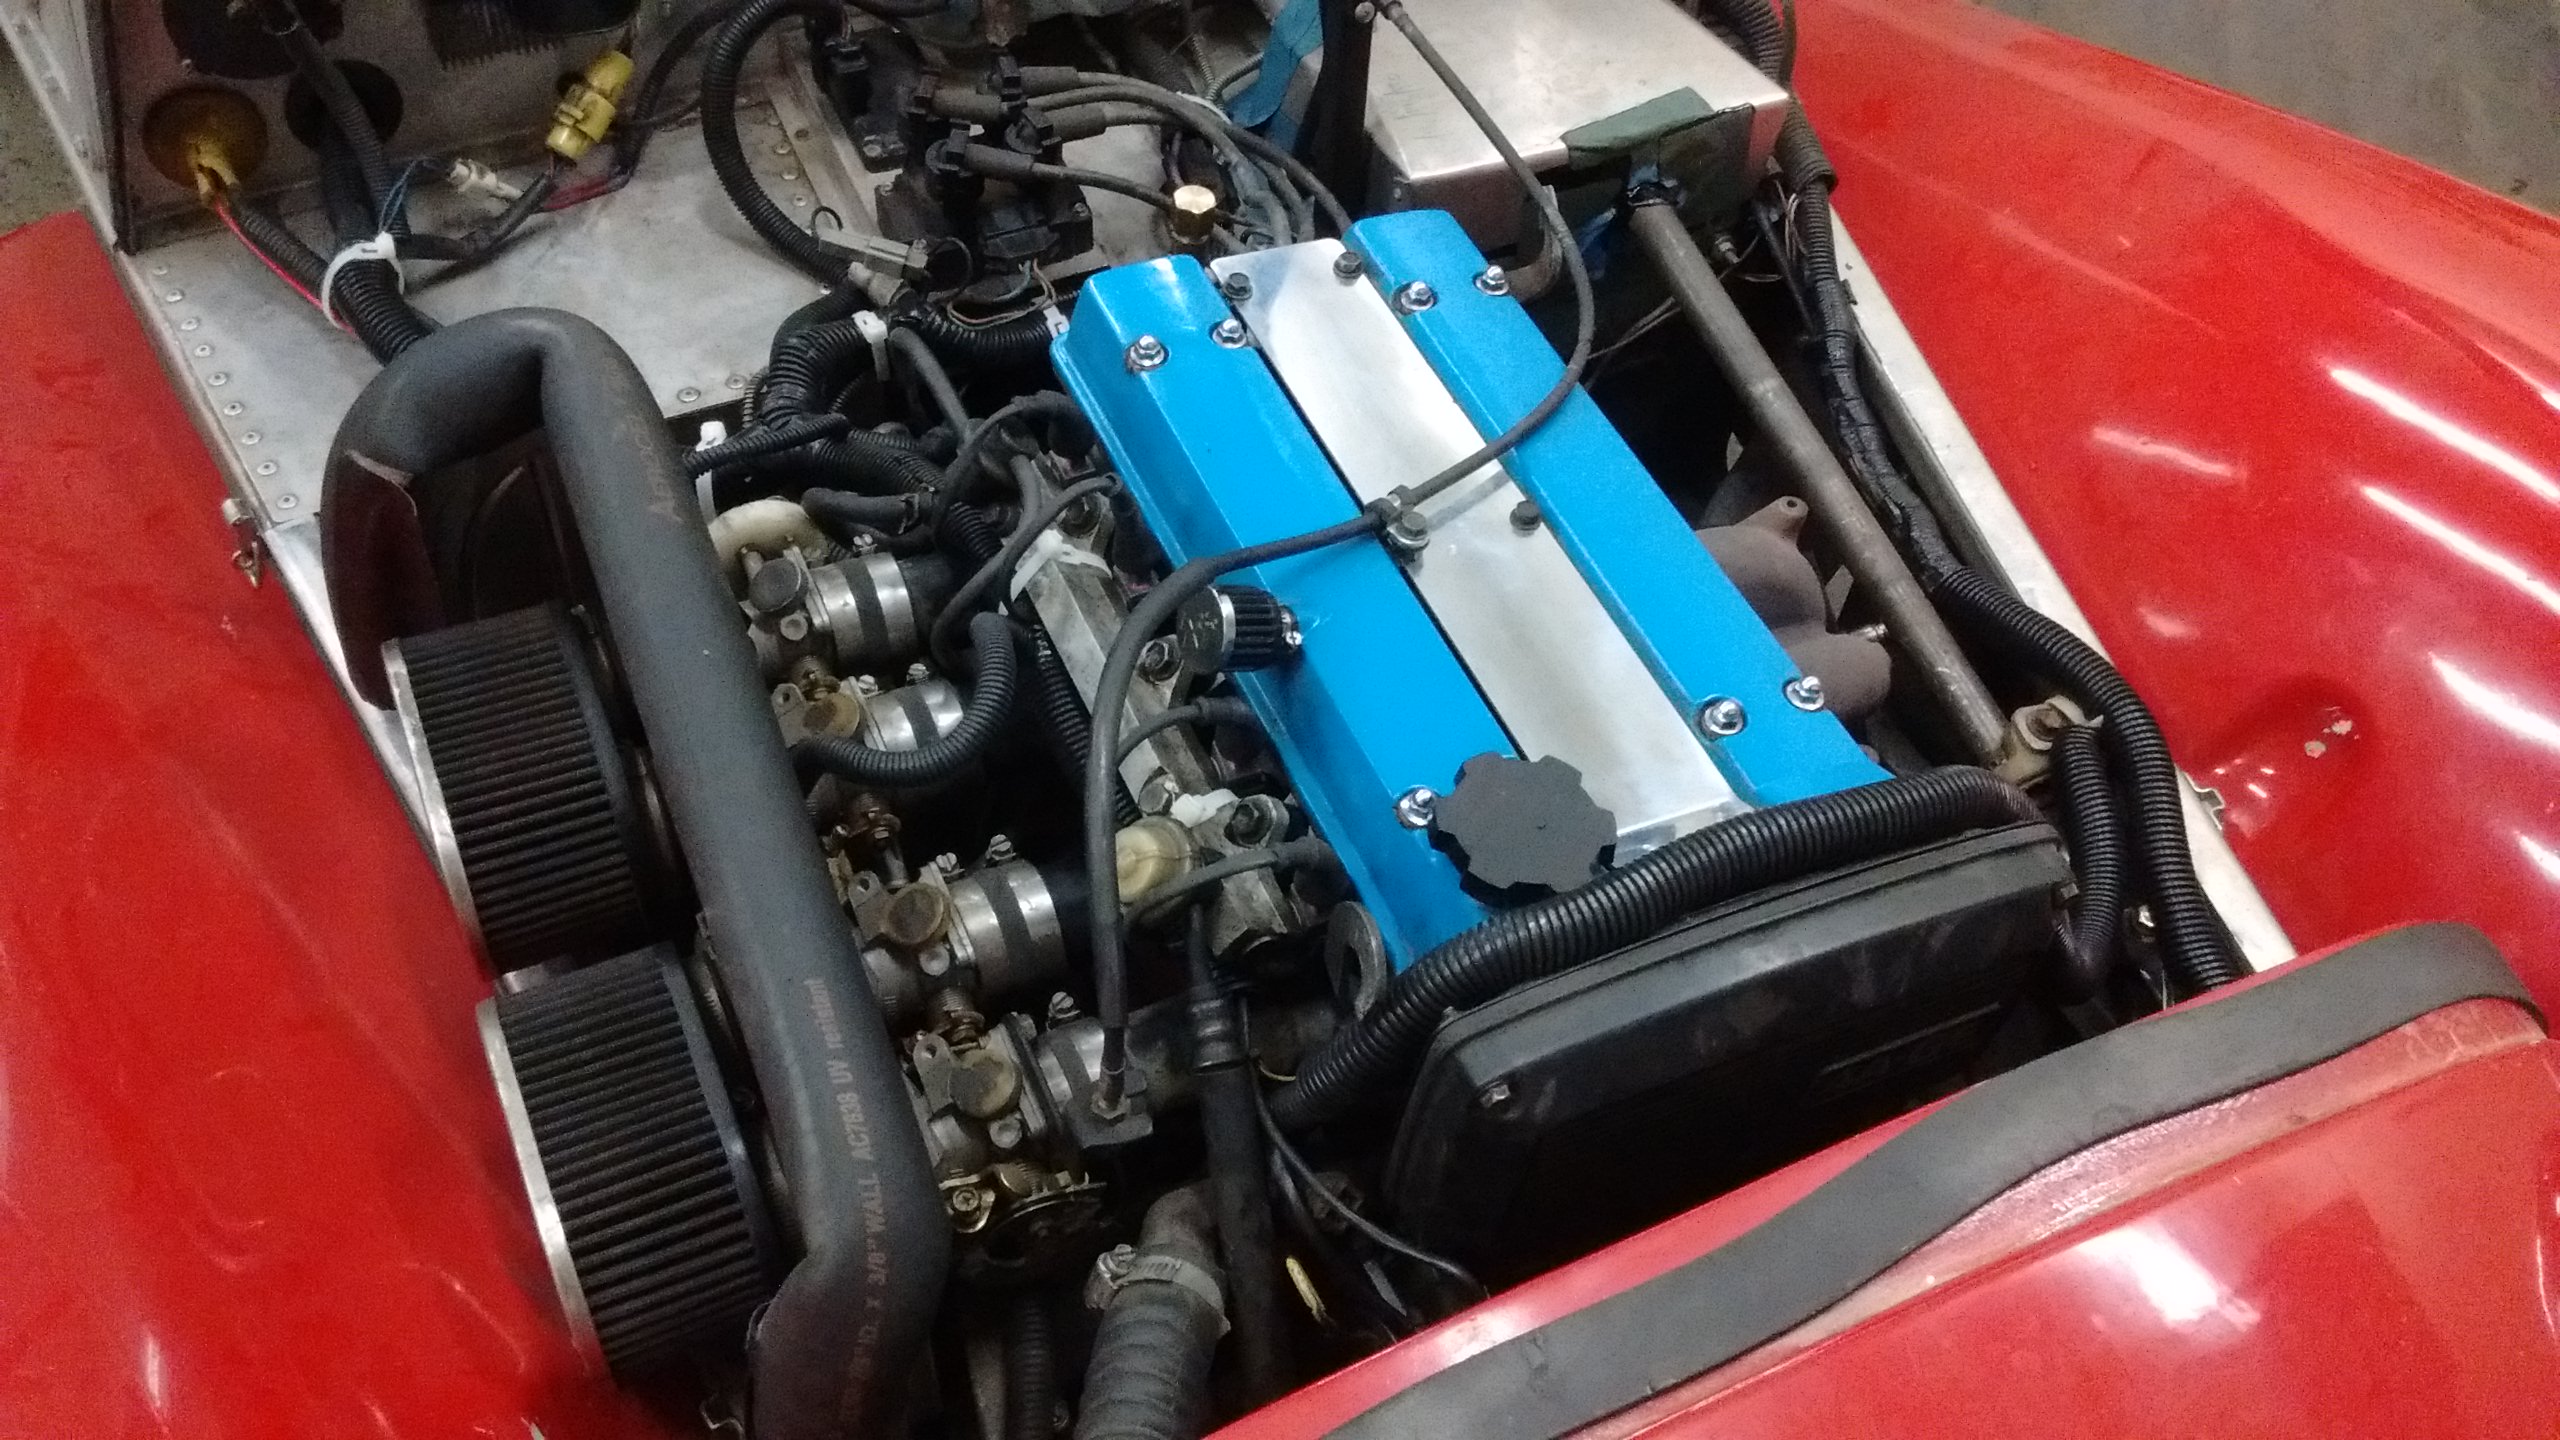
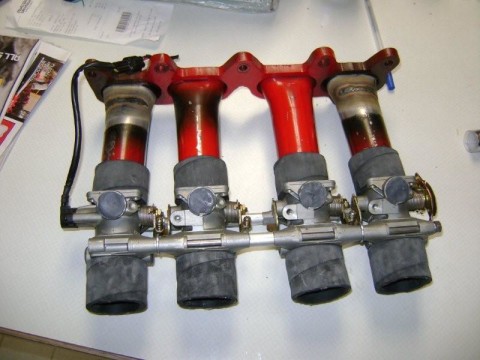
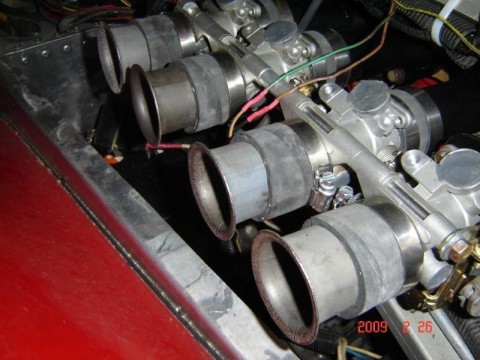
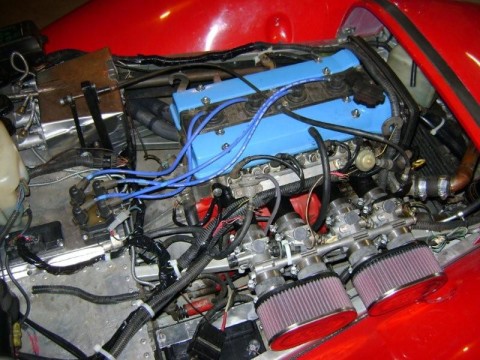
I lopped the plenum off my previously fabricated intake manifold, and tweaked tubes #1 and #4 to match the spacing of the GSX-R/600 ITB’s. I had to machine spacers to spread TB’s 1 & 2 from 3 & 4 about 3/4″, and I made longer bolts using 1/4″ rod – I welded a nut on one end, and threaded the other for the metric threads inside the Suzuki TB’s. I’ve seen people use Redi-Rod and some cobbled-together nuts and washers for that, but personally I think it looks like poo when it’s done that way.
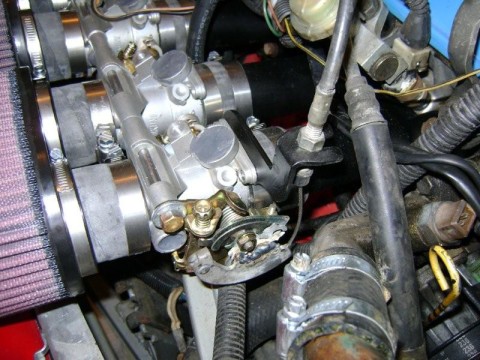
The secondary air-valve thingies were removed, as were the GSX-R injectors (since the 4AGE injectors are in the head). The holes were filled with “Quick Steel” epoxy putty, after cleaning them thoroughly and cutting threads into the holes for the putty to grip. The 4AGE throttle cable rotating thingie was cut off and welded to the ITB’s as the GSX-R one was too small.
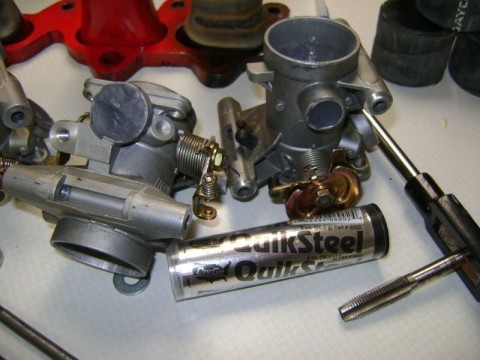
Plugging holes in the throttle bodies
Air Filters
I used bulk straight rad hose to connect the ITB’s to the intake runners, and some hand-made trumpets to the ITB’s. K&N has air filter #RC-3510 for a Legend/Dwarf cars running Yamaha FJ1200 motors – they fit perfectly onto the hose I used to attach the trumpets. The trumpets were made out of exhaust tubing, annealed and pressed over a die I machined to the same taper at the TB’s, the correct length, and as hefty a radius as I thought I could get away with.
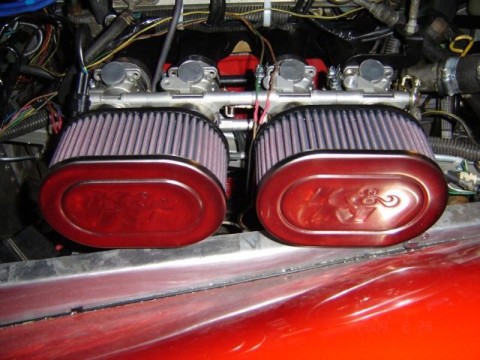
K&N filters: a bit more than $5
Re-wiring
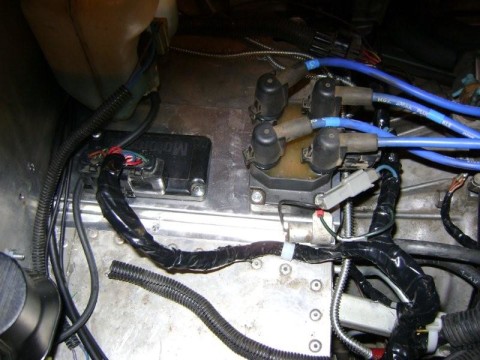
This is where I regretted trying to use as much of the Toyota harness as I did. That was a stupid, stupid move. It made the MegaSquirt rerofit needlessly complex. I followed the factory wiring harness diagram, and matched it as best I could to what MegaSquirt needed. Luckily (or, masochistically), I really enjoy electrical.
- Using EDIS, almost all of the ignition circuitry was removed
- Deleting the MAF required a different method to turn the fuel pump on – thankfully MegaSquirt does this internally.
- The Corolla tachometer can not run off the DTS pin #2 of the EDIS module – you need a pair of 1N4007’s tapped into each coil negative, connected to a 1N4746 18V Zener diode to feed the tach. Probably $2 in parts. It works awesome.
Tuning
I had almost zero success finding base maps to begin with. The few that I found either didn’t make sense to me, or were not at all for a blue-top 4AGE. For an engine with such a wide fan-base, I was surprised that nobody had anything available.
You use MegaTune to set up the engine, and then use MegaLogViewer to datalog what’s happening and you can let it adjust things, or you can make adjustments. I did both.
Oh yeah, you’re really going to want a wide-band O2 sensor. I bought an Innovate LC-1 as it was relatively inexpensive and seemed versatile.
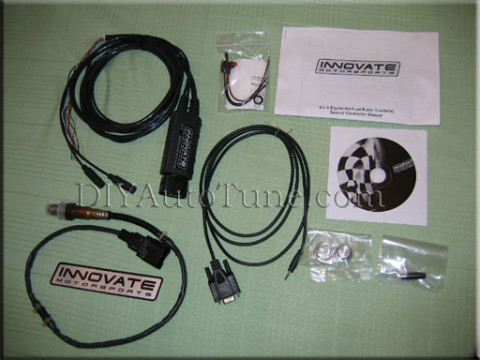
Innovate Motorsports LC-1 (DIY AutoTune image)
NOTE: While there are “suggestions” for Air-Fuel Ratios (AFRs), you are really pulling them out of your bum. If you get them right – joy. If you get them wrong – tuning sadness.
Start by understanding that most of your driving will be under very little throttle, and very little throttle can produce dramatic changes in your MAP. I started with my MAP bins being widely spaced below 80kPA (covering less than half of the bottom of the table), and then very narrow spacing for the remaining 20%. As you datalog, you will see what your throttle Position Sensor (TPS) is doing, your Manifold Absolute Pressure (MAP) is doing, and get an idea of how your table should look.
Many websites have mentioned how difficult it is to tune ITB’s. Many give up trying to run Speed Density (MAP/RPM-based) and tune to run Alpha-N (TPS/RPM based). Other more adventurous sort run blended tables (a bit of both worlds). I’ll keep you posted with where I end up. Keeping in mind this is not my daily driver, and I can afford to compromise some driveability for the sake of “fun.”
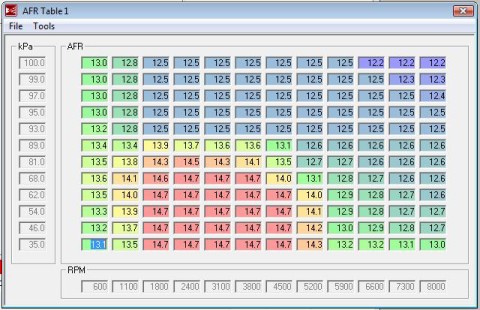
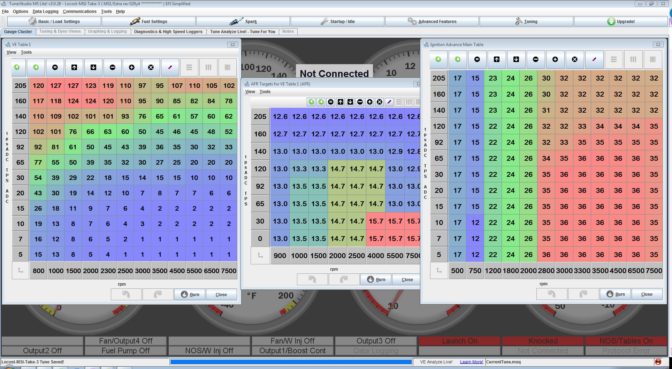
I set up fuel using the default “Generate” feature of MegaSquirt, and ended up richening the “cruise” to 14.7 to get rid of some surge and stumble under light throttle, I shifted the “lean cruise” area higher in the RPM (based on the rpm ranges I previously cruised at), and had to richen up quite a few cells to smooth out the acceleration.
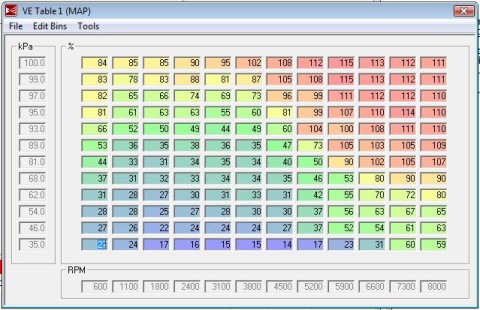
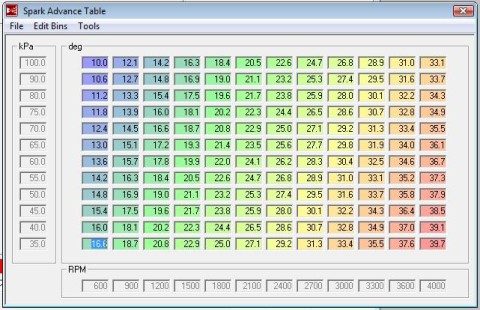
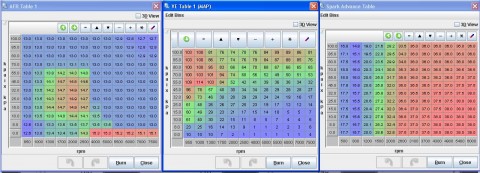
As of this writing, here are my tables so far (March 2009):
Assessment So Far
Two words: Awesome!
The tuning is by no means perfect, and there are still some low-speed stumbling going on, it’s a better car! The engine has far more torque than before. The ITB’s are also freaking loud. The cold start and cold running, despite having no Idle Air Controller (IAC) other than my foot, is head and shoulders better than before. The transition of power through the rpm range is much more impressive than before, which means the “tuning” issues I had with the OEM ECU are gone. I’m impressed!
It’s a very different beast to drive, as well. You need to be much more gentle on the throttle – it’s hard to be smooth at low speeds, and any stumble which causes your foot to bounce only amplifies the stumble (I may also need to build a more “progressive” throttle wheel).
I love the ability to tweak the tables and see improvement. I’m a tweaker and a control-freak, and this is candy for me. It will be interesting to see how this progresses.
Addendum 2010
I gave up on Speed-Density tuning and have switched to Pure Alpha-N.
NOTE TO SELF 1:
(MSII) Intermittent “dropping a cylinder” or “missfire” that is only fixed by a re-start
Go to “Noise Filtering – EDIS” box under Basic Settings
Reset “next pulse tolerance” normal running up to 70% (from 25%)
Accel-Enrichment is addressed in the next NOTE TO SELF.
A few years later….
MSI: MSnSE
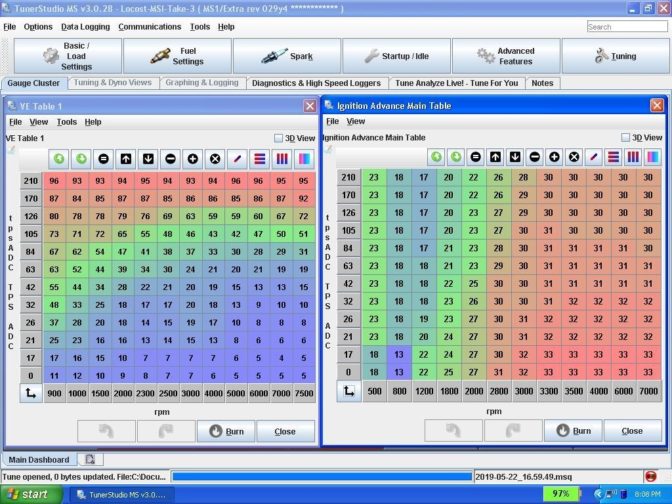
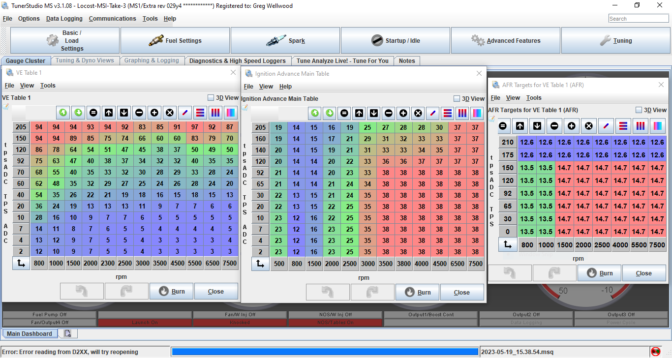
Still Alpha-N. Changed the AFR table to better reflect where my cruising happens (3000 to 4000rpm).
VE and SA tables now look like this:
And still more years later:
Better resolution at low throttle openings, constant Baro, and playing with different timing to get a better idle. Always continuing the tuning…..
2023 update, since I found THIS video:
NOTE TO SELF 2:
(MSI) Difficult to get a smooth Accel Enrichment running strictly off the TPSdot (constant Baro for Alpha-N). AE was maxed out, and still not rich enough.
Reduce TPSdot Threshold(v/s) considerably (maybe to 0.4 instead of 35) fattened up the AE considerably.
NOTE TO SELF 3:
As I’m onto my third sensor, you’re looking for the Bosch 17014 because I’m pretty sure you’re going to be in here again. #1 (rip): 2009-2017; #2 (rip): 2017-2021
NOTE TO SELF 4:
Poorly positioned IAT is reading falsely too hot. “Coolant-Related Air Density” in “Basic/Load Settings” – in “Settings” switch to “IAT-Corrected” correct the temperature to what it should be (ie: if it’s reading 120° and it should be 110°, set it to 92%).

